The Javascript SDK offers client-side functionality for session storage and conversions to Advertisers. By utilizing the Javascript SDK, advertiser will have the accuracy of server-side postbacks with the setup effort of client-side pixel tracking. This tutorial will introduce you and your advertiser the steps of setting up your Offer, adding the SDK to a page to start & store sessions, and then fire a conversion.
Step 1: Adding the Snippet
Adding the Javascript SDK is simple. Let your advertiser paste the code below to the head of any site to add the SDK's functionality:
<script>
!function(){var o=window.tdl=window.tdl||[];if(o.invoked)window.console&&console.error&&console.error("Offerslook snippet has been included more than once.");else{o.invoked=!0,o.methods=["init","recognize","transform"],o.factory=function(n){return function(){var e=Array.prototype.slice.call(arguments);return e.unshift(n),o.push(e),o}};for(var e=0;e<o.methods.length;e++){var n=o.methods[e];o[n]=o.factory(n)}o.init=function(e){var n=document.createElement("script");n.type="text/javascript",n.async=!0,n.src="https://common-files.offerstrack.net/ol-sdk.js";var t=document.getElementsByTagName("script")[0];t.parentNode.insertBefore(n,t),o.domain=e}}}();tdl.init({ "network_name": "tracking domain" });
</script>
Before you provide the code to your advertiser, you'll need to replace “TRACKING DOMAIN” with your network's tracking domain
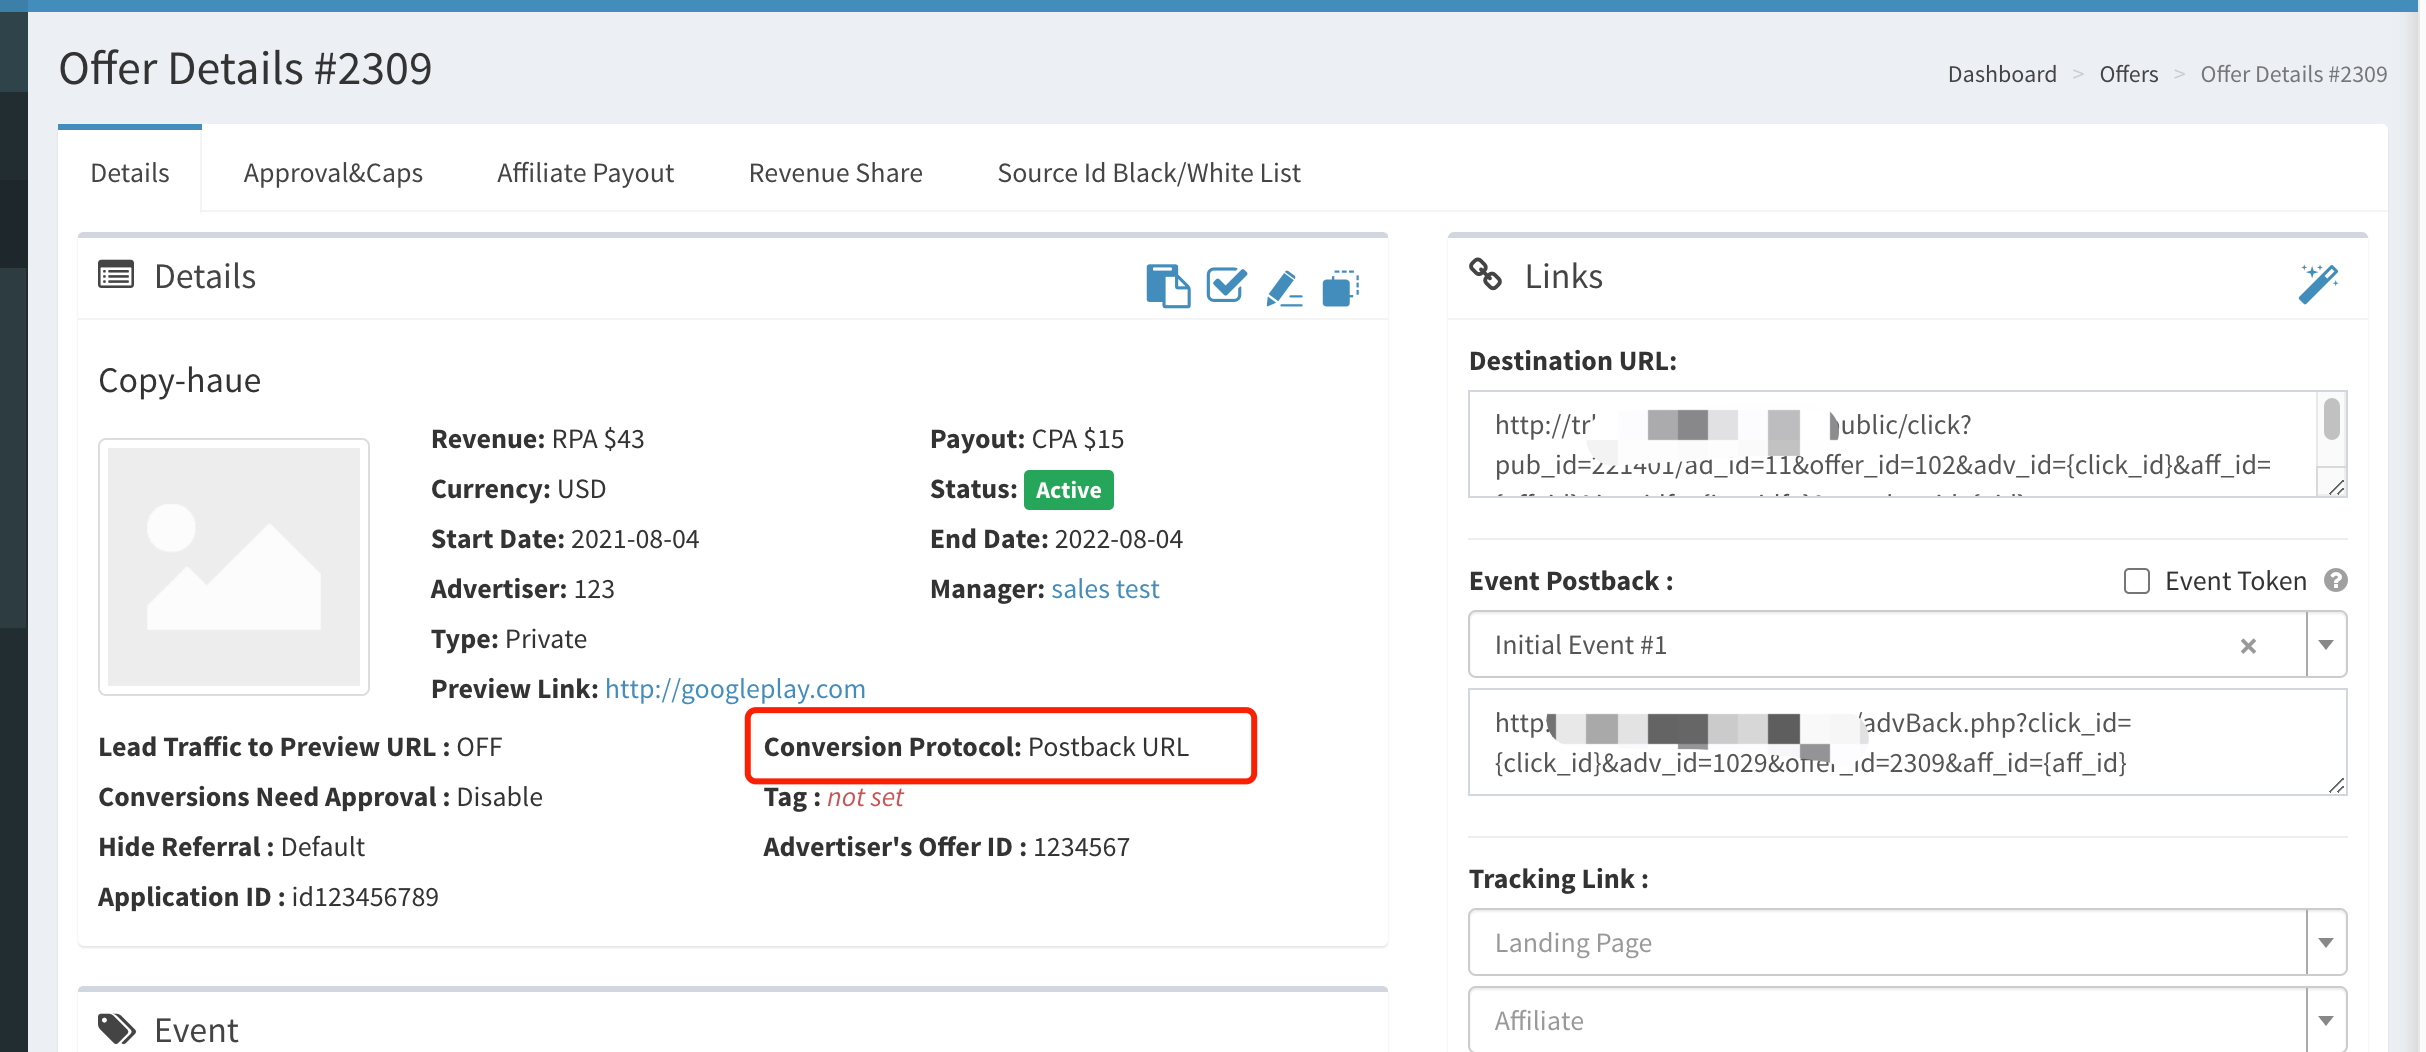
Your tracking domain can be found in Offer Details-> Tracking Link by selecting an affiliate and generate a tracking link. Unless you have set a custom tracking domain, it will look like this:
http://test.offerstrack.net/
The above code will load additional methods asynchronously as to not affect the page's load times. As soon as the code has loaded, advertiser can then call other methods to either track a session or post a conversion. Advertiser can do so by calling either of the other two methods: recognize or transform.
Supporting Multiple Networks with the Same JS SDK
In cases where an advertiser is working with multiple different Offerslook networks, the Javascript SDK can support all of them at the same time. In these cases, the setup is as follows:
The 'init' call for the JS SDK should reflect all of the partners the advertiser is working with. This is how the initialization call should be structured in these cases:
tdl.init({
'[Network Name]':'[Tracking Domain for Network A]',
'[Network Name]':'[Tracking Domain for Network B]',
...
})
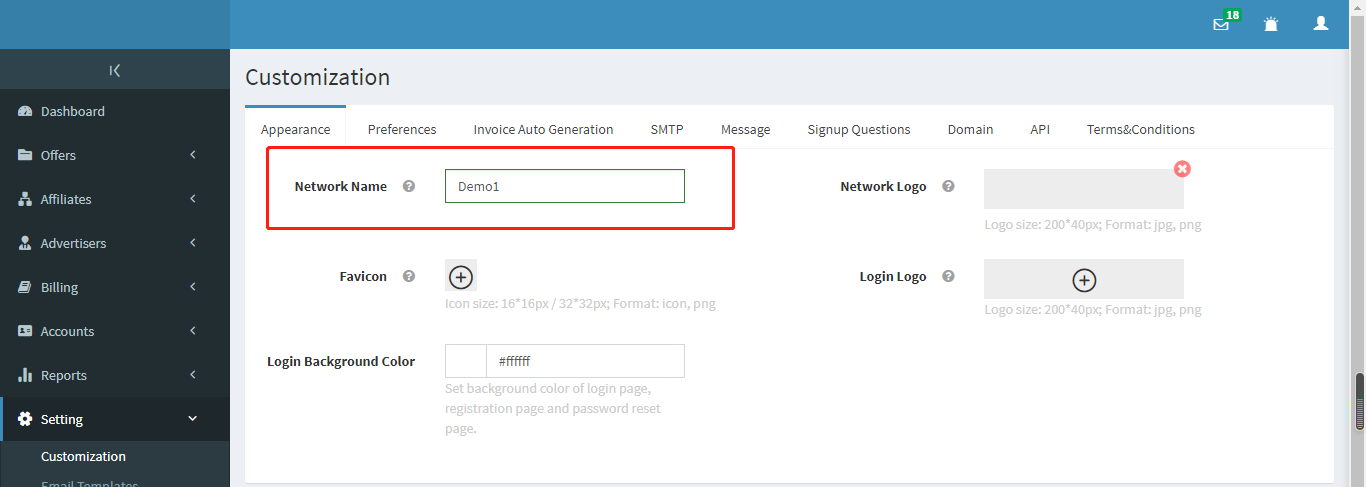
Your network name can be found in Setting->Customization->Appearance->Network Name.
An example of a successful 'init' call is as follows:
tdl.init({

  'other1':'https://testnet1.offerstrack.net',

  'othernet2':'https : //othernet2.offerstrack.net'

})
In cases you are working with multiple advertisers using the Javascript SDK, you need to ensure that you're including your network name in the Destination URLs used for each advertisers. This network name is noted in the Setting->Customization->Appearance->Network Name. The network_name should be included at the end of the Destination URL as follows:
...&network_name=[Network Name FOR THIS NETWORK]
An example Default Destination URL would be as follows, with the additional parameter highlighted in bold:
https://offer.advertiser.com?click_id={click_id}&network_name=demo1
Step 2: Recognize
Note: The following section assumes the advertiser has installed the SDK's base code on their page as described above.
The recognize method is called when the advertiser wants to store or generate a user's session. If you're familiar with our traditional tracking links, this method largely corresponds to a "click".
At it's more basic, the recognize method can be called like so:
tdl.recognize()
That will pull the click_id parameter from the URL's query string and store it in the user's browser's local storage.
We recommend using a backend template or theme to help inject the call into the footer or header of every page of the ad site a user might first visit. That way, no matter which page or product the user first lands on, they will always have their session stored.
Step 3: Transform
The transform method enables the advertiser to record a conversion using the user's currently stored session. Since the session's Click ID has the associated affiliate and offer IDs, it does not need to include these when calling the transform method.
At its most basic, the transform method is simply:
tdl.transform()
The transform function is fully capable of handling events and postback parameters. Including these optional fields will allow the advertiser to record additional information during conversion. If we wanted to record a event conversion with an additional parameter included, an example would be:
tdl.transform({

  'event_token':'purchase' ,

  'adv_sub1':'abc123'

})
Advertiser can also pass the event ID in a similar manner:
tdl.transform({

  'event_id':'4' ,

  'adv_sub1':'abc123'

})
If the offer is only initial event,no need to add the event_token or event_id parameter,an example would be:
tdl.transform({'adv_sub1':'abc123'})
Step 4: Offer Configuration
The destination URL of the offer should includes click_id and network_name parameters.
For example,
https://offer.advertiser.com?click_id={click_id}&network_name=demo1
The Network Name can be found in Setting->Customization->Appearance->Network Name.
Conversion Protocol is Postback URL.
**PLEASE NOTE**
When jump to the page where the SDK is added, the URL that triggers the conversion needs to have the click_id parameter, otherwise the conversion cannot be generated.